It has become a huge buzzword in physical fitness and artistic movement: Alignment.
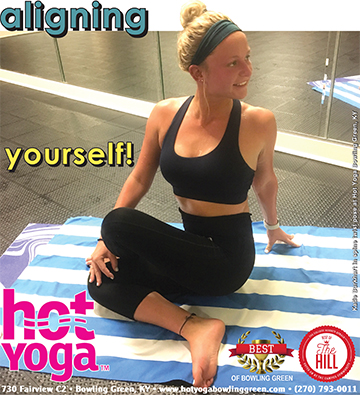
Alignment can mean any number of things, depending on whom you ask. Alignment can refer to one’s life in general. Aligning yourself with excellent attitude, life goals, professional training, an exciting career choice, and spiritual to physical balance can be as important as your spinal condition for a full life. We suggest a generous dose of God-centered spirituality and great yoga to match!
Alignment takes a strongly yogic STANCE (pun intended!) with regard to proper placement of parts of your body during movement. Knees, shoulders, back, ankles and feet, neck, hips, chest, elbows, wrists and more benefit from correct movement learned during a great yoga class. Improving, healing, and thriving are available through yoga and the alignment it continues to promote… even after 5,000.
So how do we apply “alignment” to our new or ever-developing yoga practice? Alignment in yoga simply means bringing your body into correct position to receive the benefits of a posture while being safe doing so. This can vary depending upon the person, but generally is solid and secure when done with a great yoga teacher. This author is a devout practitioner of proper alignment, so I would like to share the following sequence of wise advice quoted from a recent article at yoga.com…
1. Lengthen the Spine
Unless you are doing a backbend or are specifically cued by your teacher to round your spine, keep your back long and straight during your yoga practice. Although it is tempting, especially in forward bends, to round our backs, it is very important that we keep our spines long. We spend all day slumped over in a car, at a desk, or on a couch. Don’t let this bad habit cross over into your yoga practice.
Examples: In forward bends such as Paschimottanasana (Seated Forward Bend) and Upavista Konasana (Wide Leg Seated Forward Bend), don’t let the temptation to bring your face close to the floor or your knees guide you. Instead, maintain the integrity and length of your spine, even if it feels as though you’re not going as “far” into the posture.
2. Keep Your Shoulders Away From Your Ears
We build up and store so much tension and stress in our shoulders and neck in our daily lives that we become unaware of it. This build up of tension restricts the energy flow in our body, limits our yoga practice and can be just plain painful on top of that! Allow your yoga practice to reverse this unhealthy habit by actively bringing your shoulders down and away from your ears during your practice.
Examples: In postures where your arms are extended above your head, such as tree pose and chair pose, experiment with raising your shoulders as close to your ears as you can, and then move them down and as far away as possible from your ear. You might want to bend your elbows or separate your arms a bit. Feel the difference in your shoulders and neck, and your posture and practice in general.
3. Inhale and Open, Exhale and Close
As you transition in and out of postures, align your breath with each movement. When you open or widen your chest in any posture, inhale. When you close your chest or torso, exhale. This matches the natural tendency of the chest and abdomen to expand on the inhalation, and contract on the exhalation.
Examples: In Sun Salutations A and B, inhale as you lift your arms over your head and open your chest, and exhale as your bring your arms toward your feet and fold forward.
4. Tuck Your Tailbone
Our lower backs, or the lumbar area, are already pretty weak from sitting in chairs all day. Sticking our gluteus area out and over-exaggerating this curve only makes this structural issue worse. Finding alignment by tucking our tailbone protects our lower back by engaging and strengthening our core muscles.
Examples: In standing postures such as Virabadrasana A (Warrior 1), Virabadrasana B (Warrior 2), and Parsvakonasana (Side Angle Pose), draw your stomach toward your spine and tuck your tailbone to protect your lower back.
5. Equally Distribute Your Weight
To create a strong, balanced foundation for your standing postures, your weight should be equally distributed throughout the four corners of your feet. If your feet are misaligned or your body weight is off center, it will be very difficult to maintain a tall, spacious, and grounded pose. Without this foundation it will also be nearly impossible to maintain proper alignment throughout the rest of the body.
Examples: Experiment with your feet in Tadasana (Mountain Pose). Ideally in this pose, your body weight will be evenly distributed between the heel and ball of the foot and the outer and inner foot, with your toes spread wide for support and balance. Once you find this alignment and balance in Tadasana, you can apply it to all standing and balancing postures.
Important thanks and CREDIT to yoga.com as the preceding five points were respectfully quoted from a yoga.com article “5 Tips to Improve Your Pose Alignment.” This author appreciates the quality information and wisdom that was communicated within that piece.
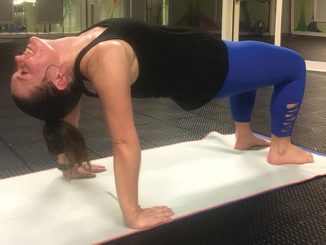
And now, here it is… Your June 2019 “Pause for a Pose” – The Seated Spine Twist
In our Hot Yoga traditional classes, we end our regular posture practice with this pose just prior to final breathing cool down. This pose lengthens and moves the spine while stimulating the internal body and toning the abdominals and surrounding muscle groups. Always check with your healthcare professional if you have any questions regarding the appropriateness of a posture for your individual health. If you have lower back issues, simply remain seated straight up and keep you spine lengthened. Sit on your mat with legs extended in front of you. Bend the left knee and slide the left foot to the right, outside the right hip as you float your right foot up and over the left leg. Left leg may remain straight if you have a knee issue. Right knee is up and to the left, right foot is on the floor next to your left hip. Right arm slips behind the back, flatten the hand on the floor at the base of the spine. Left arm comes over and across the right leg as the left hand grasps the left foot or simply remains straight up in flat palm “salute.” Press left elbow into right leg, inhale and lengthen spine (with neck) as far as possible… exhale and turn the torso to the right… pivoting at the hip joints/pelvis. Pull navel in, squeeze the abs and breathe through 3 to 5 slow breaths. Release and repeat on other side. Now, enjoy practicing this pose all month as you work toward longer spine and eventually getting your heels in a straight line with one another in this position! We will see you tomorrow at Hot Yoga.
– by Tony Bishop
About the Author: Tony Bishop, E-RYT/RYT/CYT,is director and chief instructor with Hot Yoga Bowling Green, Kentucky. He is certified and trained in a myriad of health and fitness disciplines including Hatha Yoga, Yoga Personal Training, Yoga Coaching, Yoga Teacher Training, Sil lum Kung Fu, Tai Chi exercise, spinning/indoor cycling, PowerHouse Pilates instruction, core conditioning, self defense programs and boot camp variations. He has almost 6,000 hours of yoga teaching experience, he is registered through Yoga Alliance and is an avid researcher and proponent of progressive yoga movement and development of more effective, deeper and meaningful training methodology. Contacts: 730 Fairview Avenue, C-2, Bowling Green; 270-793-0011; hotyogabg@yahoo.com; www.hotyogabg.com.